How to Install Getbehind.me on Windows 11:
Step 1 – Download:
Click here to download the latest version of Getbehind.me client for windows.
Step 2 – Extract the File:
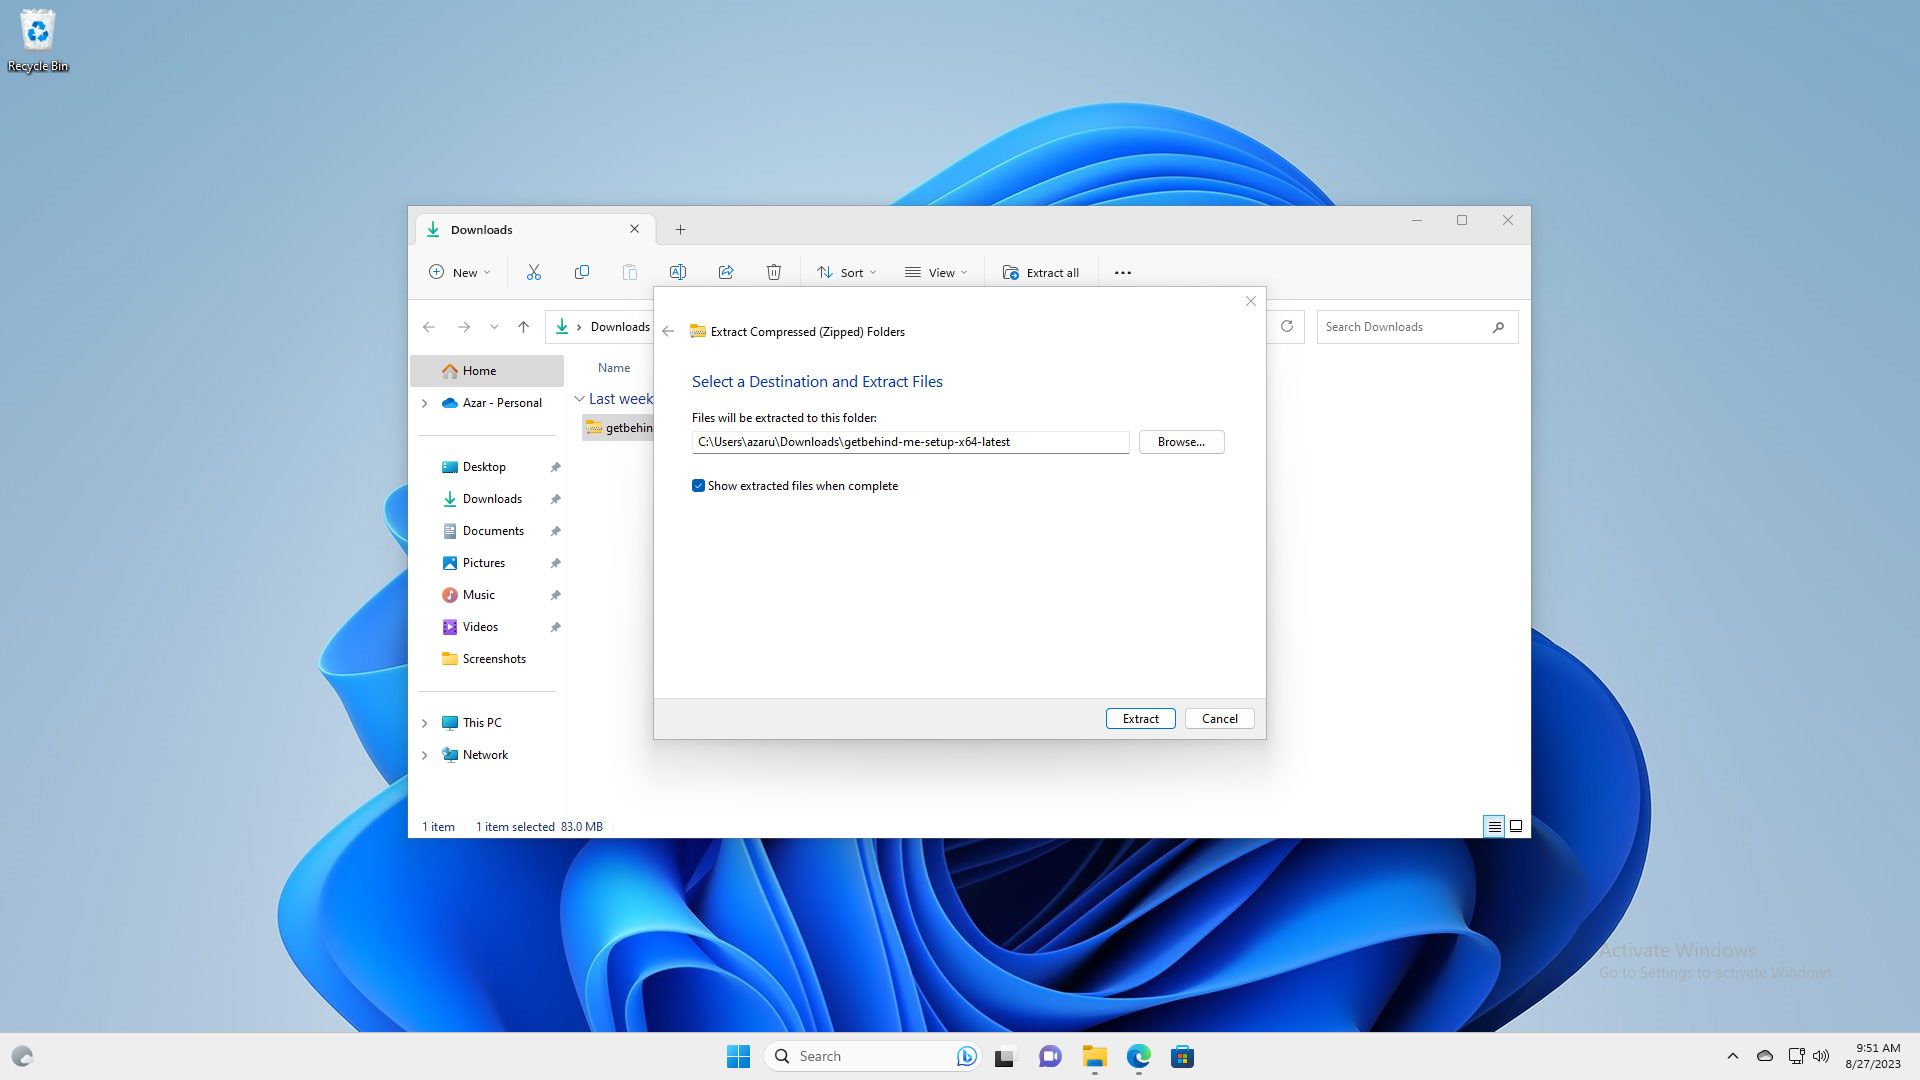
Locate the downloaded ‘getbehind-me-setup-x64-latest.zip’ in your Downloads folder. Right-click the zip file and select ‘Extract All’ and click the extract button in the zip extract dialog.
Step 3 – Start Installation:
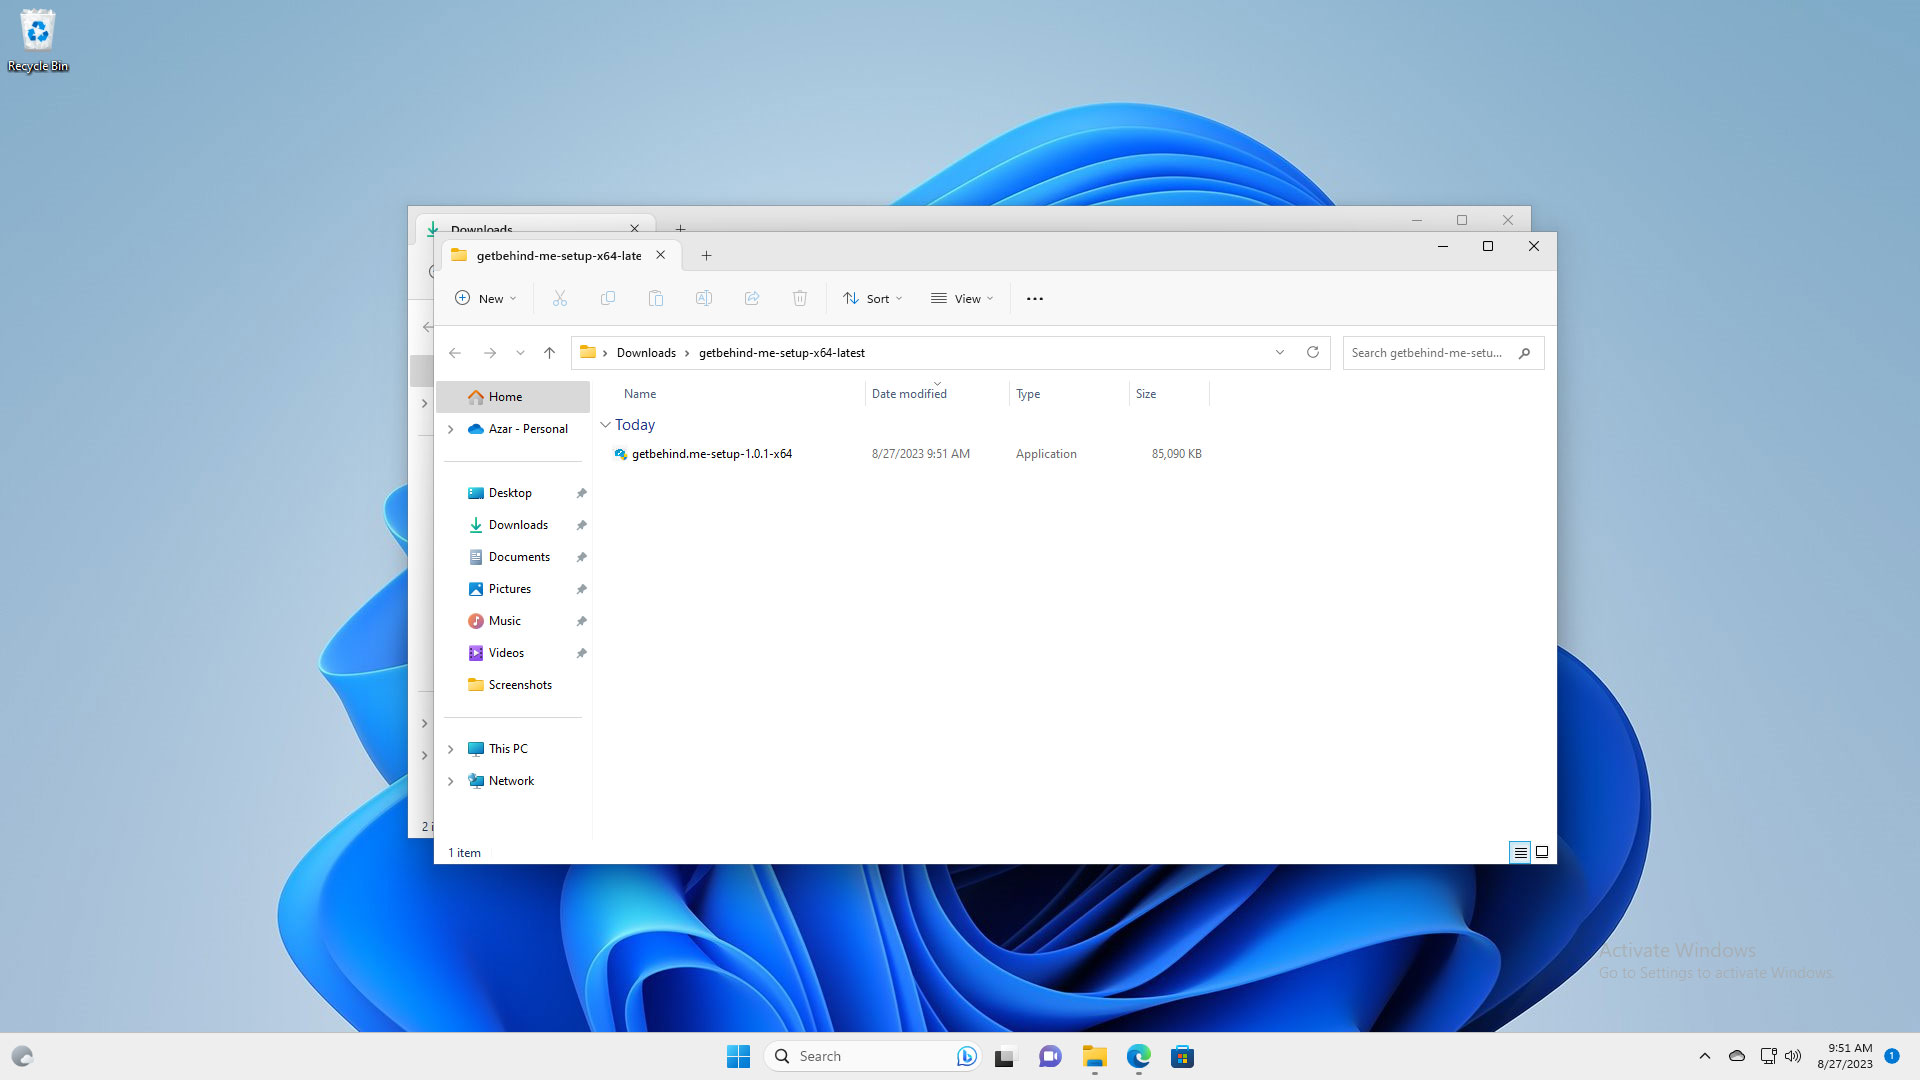
Inside the extracted folder, double-click on the file ‘getbehind.me-setup-1.0.1-x64’.
Note: If you encounter a Microsoft Defender SmartScreen alert saying, “Unrecognized app…”, click ‘More info’ and select “Run anyway”.
Step 4 – User Account Control (UAC):
Upon prompt, click ‘Yes’ to allow the installer to make changes.
Step 5 – Installation Preferences:
Choose your desired installation location or retain the default path. Then, click the ‘Install’ button.
Step 6 – Complete Installation:
Click ‘Finish’ once the installation is successful.
Step 7 – Launch The App:
To launch the app, you can either double-click the desktop shortcut or find it in the Start menu.
Step 8 – Activate the app:
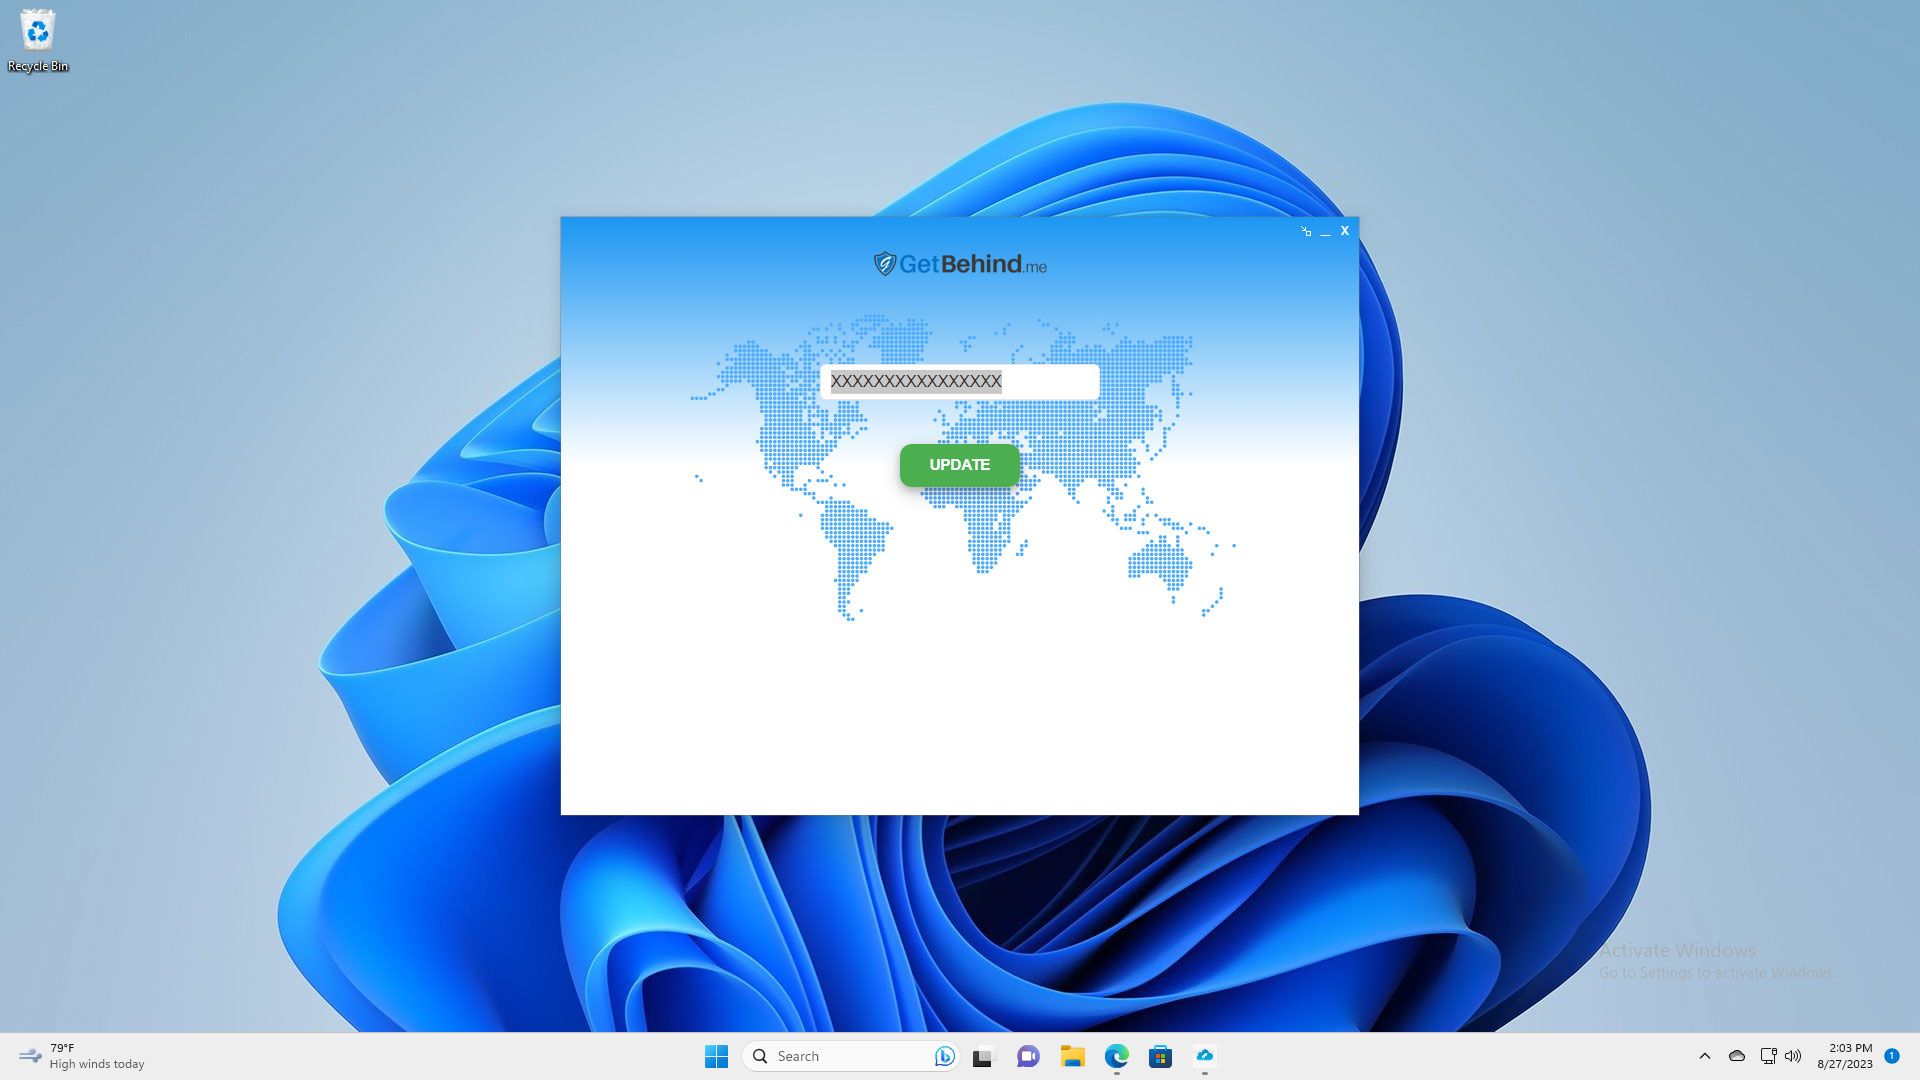
In the license textbox, type your license key and click the ‘update’ button. Your license key can be found in the order details email or you can view it on your account dashboard.


